If you encounter problems with an installed SOLIDWORKS product
(e.g. SOLIDWORKS Premium, Simulation, PDM, Inspection, Electrical etc.), you can use the SOLIDWORKS Installation Manager to repair the installation.
However, to repair an installation, your machine must have all the source files from the previous installation and any service packs that were applied, in the location where they were originally installed.
You can repair an individual installation. You cannot repair an
administrative image; you must uninstall and then reinstall the
administrative image
 |
Repairing SOLIDWORKS installation
|
Here are the steps for repairing SOLIDWORKS:
Step 1. Make sure you have the SOLIDWORKS installation files. If you installed from the SOLIDWORKS DVD, place the DVD into the drive.
If you installed from a file set downloaded directly from solidworks.com, make sure the files are present in the SOLIDWORKS Downloads folder.
Step 3. Ensure that any antivirus and /or antispyware software services have been stopped.
This can be done by going to the Start menu and launching the Run dialog. Type in: services.msc then click Run. Find the antivirus and antispyware services in the list and select Stop.
Step 4. Go to the Control Panel and open Add/Remove Programs if using Windows XP, Programs & Features if using Windows Vista or Windows 7.
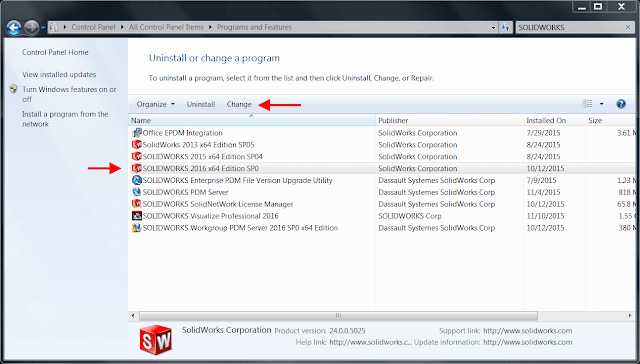
Step 5. Select the SOLIDWORKS installation from the list and click Change.
 |
| Windows Control Panel |
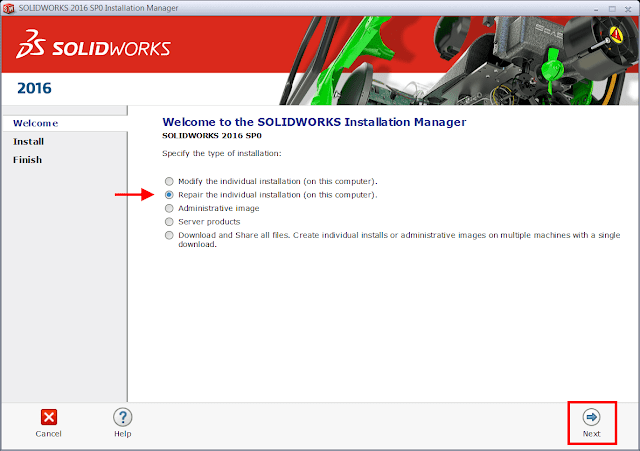
Step 6. Select the “Repair the individual installation” option and click Next.
 |
| Repair installation Manager |
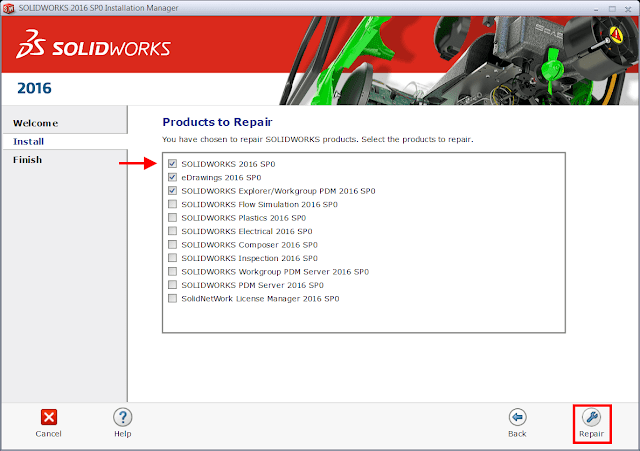
Step 7. On the Products to Repair
screen, select the product to repair
 |
| Products to Repair |
Once the repair is complete, launch SOLIDWORKS to test if the issue has been resolved.
Article by Andrew Lidstone


0 Comments:
Post a Comment